 Skip to content
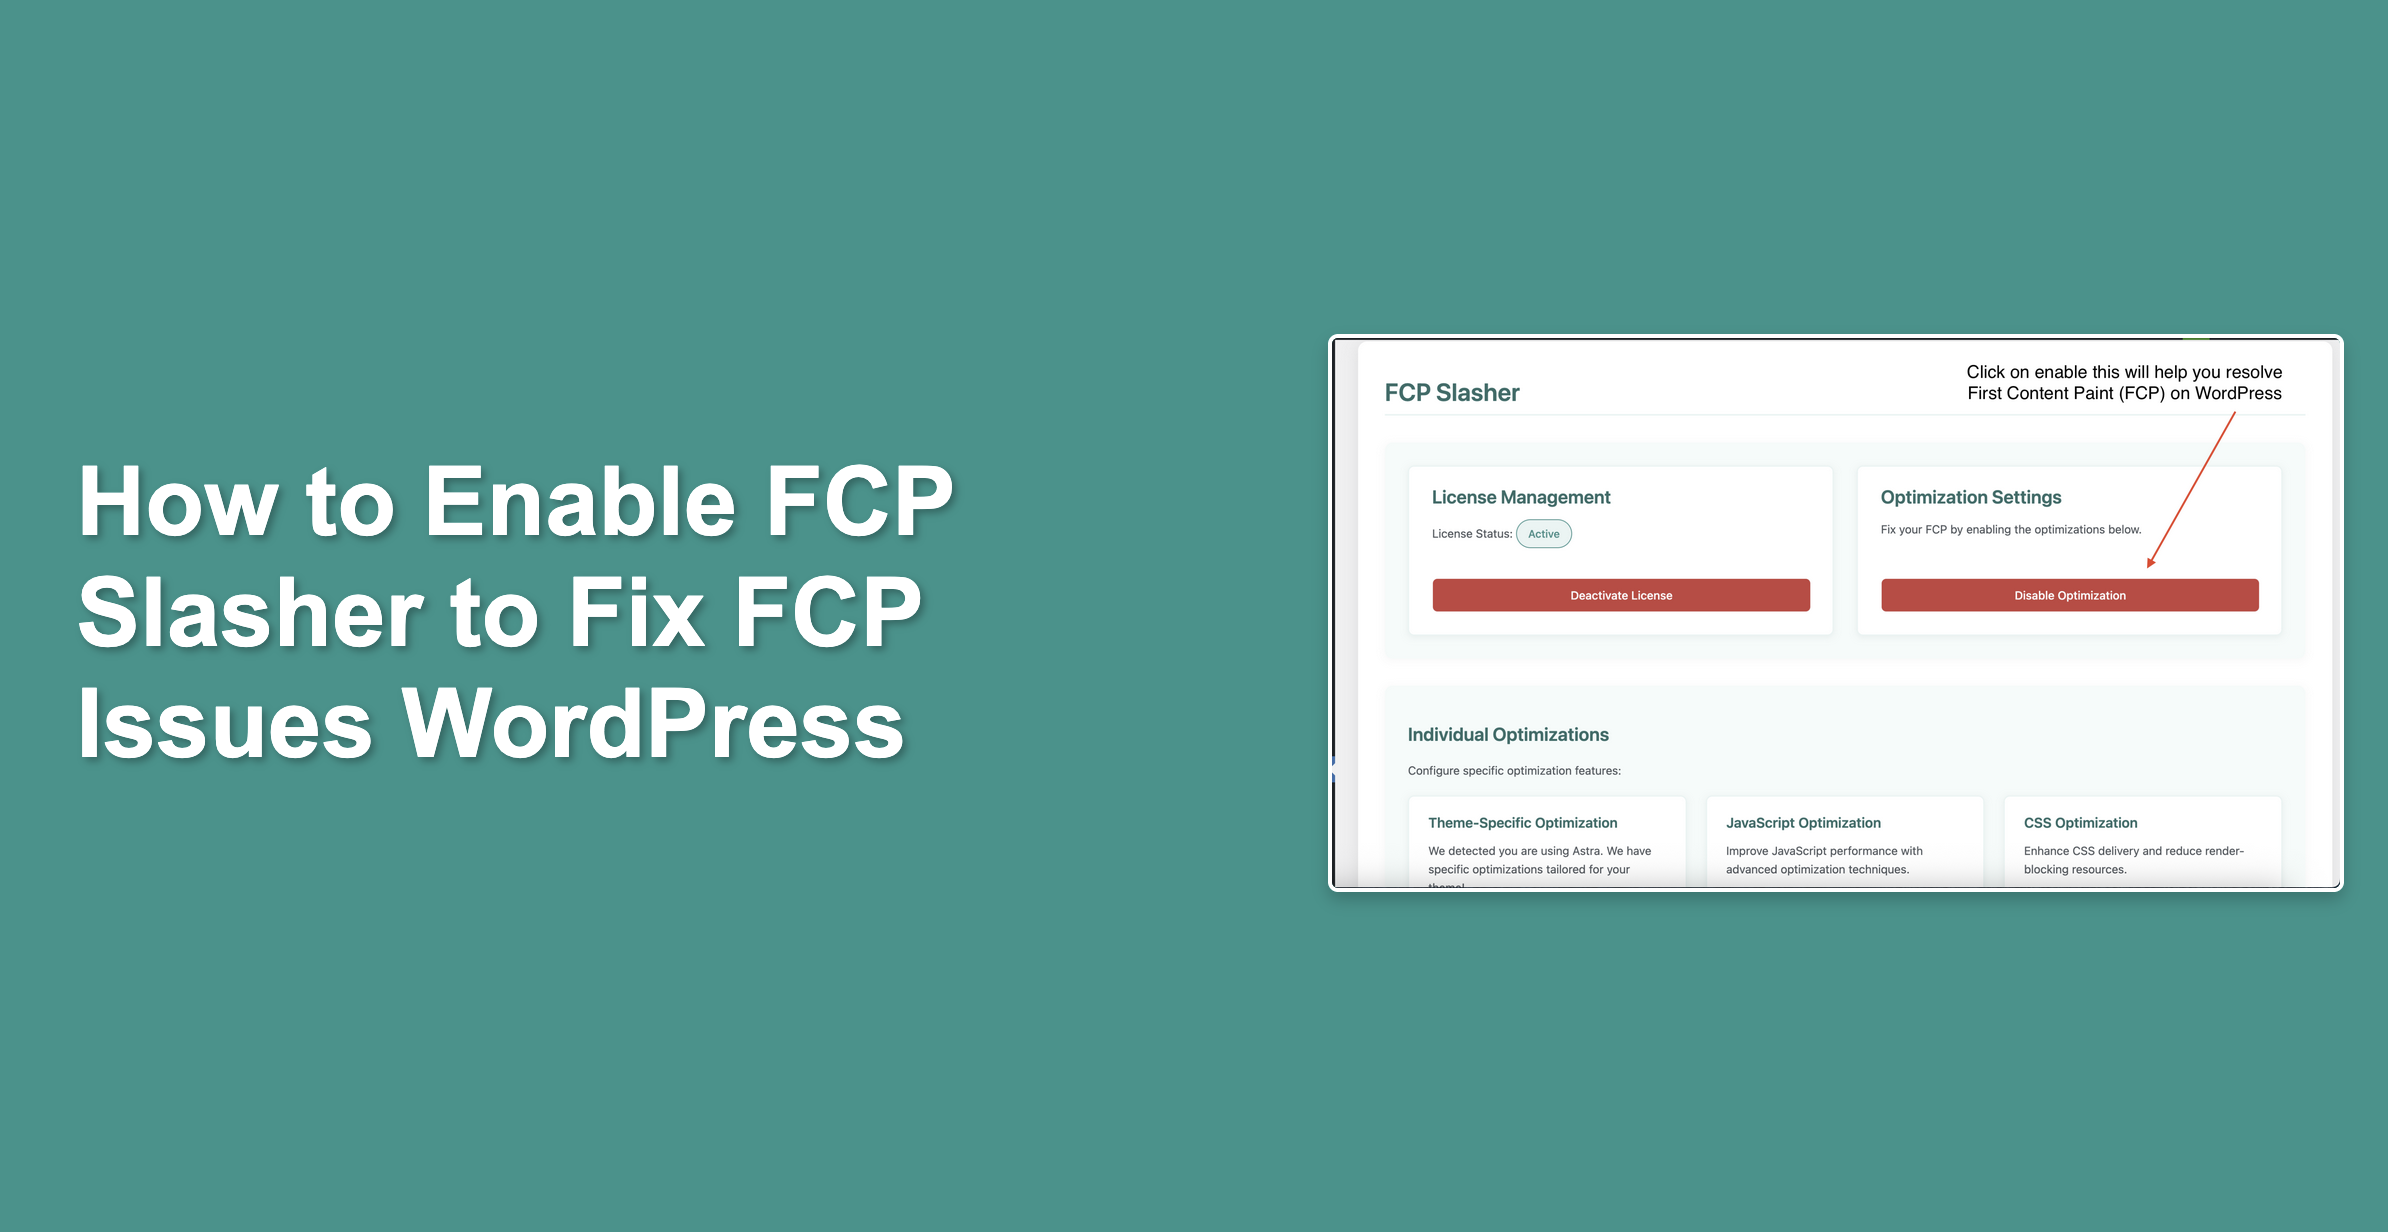
Enhance your WordPress site’s speed with FCP Slasher, a plugin designed to resolve First Contentful Paint (FCP) issues and improve user experience. This concise guide, with screenshots, shows you how to enable FCP Slasher to boost your site’s SEO and performance.
Step 1: Access the FCP Slasher Dashboard
- Log in to your WordPress admin panel at
yourwebsite.com/wp-admin. - Find “FCP Slasher” in the sidebar menu.
- Click to open the dashboard.
Step 2: Activate Your License
Activate your license to unlock FCP Slasher’s optimization features:
- Go to the “License Management” section in the dashboard.
- Enter your license key from your purchase email or account dashboard.
- Click “Activate License” and confirm activation.

Note: An active license is required. Visit our FAQ for license support.
Step 3: Enable Core Optimization
Turn on core optimizations to improve FCP:
- Navigate to the “Optimization Settings” section.
- Click “Enable Optimization.”
- Wait for the confirmation message.

Enabled optimizations include:
- HTML minification
- Resource prioritization
- Server optimization
- Render optimization
Step 4: Customize Optimizations
Fine-tune settings for maximum FCP improvement:
Resource Prioritization
- Critical CSS injection
- Resource hints (preload, preconnect)
- Script loading optimization
Server Optimization
- HTTP/2 support
- Gzip compression
- Browser caching
Render Optimization
- Image optimization
- Font display optimization
- Layout shift prevention
Step 5: Verify Performance Gains
Check the impact of FCP Slasher:
- Review metrics in the FCP Slasher dashboard.
- Measure FCP with Google PageSpeed Insights.
- Track performance in Google Search Console.
Pro Tips for Optimal Results
- Keep FCP Slasher updated via your account dashboard.
- Regularly check optimization status.
- Monitor Core Web Vitals for ongoing improvements.
- Contact support for assistance.
Explore more tips in our WordPress performance guide.